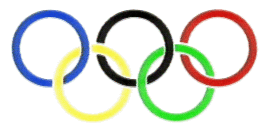
The Olympic Rings
History Lesson Plan
Your students will learn the history behind the Olympic ring symbol and they will determine its effectiveness. They will also work in groups to come up with an alternate symbol that they feel would appropriately represent the meaning of the Olympics.

information on Olympic history; butcher paper; heavy drawing paper; crayons, markers, or colored pencils
The original Olympic flag was made at the Bon Marché store in Paris. It is three meters long and two meters wide and first flew over an Olympic stadium at the 1920 Antwerp Games. The original flag also carried the Olympic motto, Citius, Altius, Fortius, which means Faster, Higher, Stronger in Latin.
Olympic Rings
The Olympic rings are the official symbol of the Olympics. There are five interlacing rings of the colors blue, yellow, black, green, and red, which are set upon a white background.
The founder of the modern Olympics, Baron Pierre de Coubertin, gave the following explanation for the Olympic ring design which he created in 1913:
"These rings represent the five parts of the world won over to Olympism and ready to accept its fertile rivalries. Also the six colours (including the background white) thus combined represent those of all nations, with no exceptions. This is a real international emblem."
The rings represent the union of the five continents and the meeting of athletes from around the world at the Olympic Games. The colors were chosen because at least one of these five colors is found within the flag of every nation.
- Present a picture of the Olympic ring symbol to your class. Have them use butcher paper to brainstorm what they know about the symbol.
- Have the groups share their knowledge about the ring logo with the class. You may want to do a KWL chart with your class at this time. Click here to find more about KWL charts.
- Then have the groups research the "real" history behind the Olympic symbol using encyclopedias, books and magazines. Give them about 10 - 15 minutes to do this.
- Discuss these findings with the whole class and clarify any misconceptions. Add new info to the KWL chart.
- Present your class with the following question: Do you think this symbol appropriately represents the Olympic games? Explain. Have them reflect upon this question in small groups.
- Your students will then work in these groups to come up with their own logo that they feel would effectively represent the Olympics. You should briefly discuss the concept of a symbol/logo, specifically how it "says" much with very little detail. It needs to be simple.
- Have them using drawing paper and the art supplies to create their symbol. They should also write a brief description of their logo and why it would be a good Olympic symbol.
Have the groups share their designs with the class. Discuss each symbol in detail including the effectiveness of each. Have your kids independently choose which one they think would be the best choice to represent the Olympics and explain why in writing.
Do your kids understand the general concept of the Olympics? Are they able to participate in the discussion about the official symbol and its effectiveness? Notice if any symbols created don't fit the assignment properly. See if there was a misunderstanding among that group. Notice which students really had a grasp of the concept of a symbol based on their designs.


